In this post, I cover the process of migrating my old blog tech stack to ASP.NET, and the resulting improvements in blog drafting and publishing efficiency.

Figure:Migrating my old blog tech stack to ASP.NET.
1. The Old Tech Stack
For several years, my go-to approach to authoring simple blogs was to use a Python-based technology stack that provided all the necessary Content Management System (CMS) features with a few extra bells and whistles. Since my blog doesn't need all of the features provided by mainstream CMS services like WordPress, I chose a solution that allowed me to pick-and-choose features as needed. This tech stack was comprised of the following elements: Python, Pelican, Jinja, and the necessary tools to author and edit HTML/CSS/JavaScript (in my case, Visual Studio Code and the Edge browser). Going into more detail for each item:
- Python: I was using the latest version of Python 3. I installed the VirtualEnv package in order to maintain the development dependencies for the blog project. https://www.python.org/
- Pelican: Pelican is a static site generator and primary component of the tech stack. It has features to support blog authoring management as well as the deployment of development and production environments; it can be installed as a package. https://getpelican.com/
- Jinja: Jinja is a templating engine used by and included with Pelican; it provides the ability to write client-side code that can query information and manage template hierarchies. In this case, it was used to manage the presentation of the major blog sections and posts. https://jinja.palletsprojects.com/en/3.0.x/templates/
- HTML/CSS/JavaScript: I used Visual Studio Code and Microsoft Edge to edit and preview code changes.
Although this combination of technologies worked well, there were several aspects that made the overall development process somewhat cumbersome, described below.
1.1. The Old Development Flow
The general flow of development, from local editing to production, using the old stack was roughly as follows:
- Setup dev environment (if not setup): Setup the development environment -> install Python, install virtualenv, setup virtualenv for the blog project, install Pelican, create a wizard-based boiler-plate project for Pelican, ensure the Pelican development server can serve the draft website. Clone the blog git repository into the development environment.
- Create a blog post or edit blog template: Create a new Markdown-based blog file with the appropriate metadata (date, tags, author, etc.) or perform edits on the blog template (modifying html, css, js, etc)
- Preview the new content: Run the Pelican command to write the updated blog to the Output directory (separate from the development directory) and preview the resulting web pages using a browser.
- Commit changes to source control: Commit changes to the blog to source control; I used Git.
- Upload changes to the production environment: The Pelican Output contains the "processed" HTML assets that can be uploaded to the production server. I used an FTP program to manage uploading content to the production server.
Using a proper DevOps pipeline, the above flow is not too tedious since a majority of those activities are able to be automated via scripting. But after becoming frustrated with the relative complexity involved in making simple blog edits, I found myself asking: "Is there a more streamlined solution that integrates each of the above steps?" That question is what led me to consider alternative solutions, and in doing so, I discovered a much more elegant (in my opinion) solution for authoring static blogs with ASP.NET.
2. The New Tech Stack
Since I am a big fan of C# and the .NET universe, I started searching for a solution in the domain of ASP.NET technologies. I almost immediately found what I was looking for: a XML-based blog CMS template based on Razor Pages implemented by Mads Kristensen and a group of Microsoft interns (Link to the .NET Blog article). This template solution provides Create, Read, Update, Delete (CRUD) operations for posts, a post commenting system, and user authentication for performing blog edits directly within the deployed site. After being amazed by the utilitarian beauty of the code, I set to work converting the CMS file parsing mechanisms from XML-based to Markdown-based (personal preference, since my preexisting blog posts were already Markdown files). Next, I stripped out the unnecessary features of the template that I did not need - which was everything except the ability to manage, parse, and present the Markdown files as rendered HTML code. The major components of the template solution that remain in my implementation are roughly analogous to the major components of the old tech stack:
- ASP.NET: The backbone of the template solution is ASP.NET, which provides all of the fundamental front-end and back-end APIs for implementing web-oriented projects. https://dotnet.microsoft.com/en-us/apps/aspnet
- Razor Pages: Razor Pages is the page-based model within the ASP.NET Core web UI server rendered models. For this project, Razor Pages enables the blog posts to be stored and queried as models, which can then be rendered within HTML pages using MVC model binding and view templates. https://learn.microsoft.com/en-us/aspnet/core/razor-pages/
- MarkDig: MarkDig is a Markdown parsing library. The blog template uses MarkDig as part of a Markdown rendering service that converts Markdown content to HTML whenever a blog post is displayed. https://geoffreymcgill.github.io/markdig/
- HTML/CSS/JavaScript: Along with the above components, I edit all of the HTML/CSS/JavaScript within Visual Studio and preview changes using the integrated Debug web browser (Edge).
Once I had the features of the original blog template modified to suit my needs, the remaining tasks involved converting Jinja template syntax to Razor Pages template syntax and ensuring that my blog post content URIs/URLs were able to be accommodated in the new project.
<div class="fix-12-12">
    <ul class="flex">
        @{
            if (Model.PostSummaries.Any())
            {
                foreach (var post in Model.PostSummaries.OrderByDescending(x => x.PublishTime))
                {
                    <li class="article-preview @string.Concat(string.Join("-category ", post.Tags), "-category ") col-3-12 col-tablet-1-2 col-phablet-1-1 ae-3 fromCenter">
                                <a asp-page="/post" asp-route-slug="@post.Slug" rel="bookmark" title="Permalink to @post.Title" class="box-74">
                            <div class="thumbnail-74 articleThumbnail">
                                <img src="@post.Image" class="wide" alt="Thumbnail" loading="lazy">
                            </div>
                            <div class="name-74 equalElement table wide">
                                <div class="cell left top">
                                    <h4 style="margin-bottom: 0px;" class="smaller ">@post.Title</h4>
                                            <time style="font-size: 16px;" class="margin-bottom-1" datetime="@post.PublishTime"> @post.PublishTime.LocalDateTime.ToShortDateString() </time>
                                    <p class="small opacity-8 margin-top-1">@post.Excerpt</p>
                                </div>
                            </div>
                        </a>
                    </li>
                }
            }
        }
    </ul>
</div>
Figure: Snippet from the blog index.cshtml that enumerates blog posts and orders them by publish time using LINQ; templating syntax is for Razor Pages.
2.1. The New Development Flow
The new development flow, from local editing to production, using the new stack is generally as follows:
- Setup dev environment (if not setup): Ensure Visual Studio is installed with the appropriate workloads (ASP.NET). Use Visual Studio Git integration to clone the blog repository into the development environment.
- Create a blog post or edit blog template: Create a new Markdown-based blog file with the appropriate metadata (date, tags, author, etc.) or perform edits on the blog template (modifying html, css, js, etc) - this step is the same as with the old tech stack.
- Preview the new content: Run the Visual Studio debugger to view the blog content in a web browser.
- Commit changes to source control: Use Visual Studio Git integration to commit and sync changes to the GitHub blog repository.
- Upload changes to the production environment: I use Azure to host the blog and GitHub Actions to deploy the blog - as soon as I commit a change intended for the production environment, a GitHub Action automatically builds and deploys the blog to Azure.
The biggest benefit from using the ASP.NET tech stack is the integration of all development flow steps - I only need Visual Studio when creating or changing content. Since the Visual Studio - GitHub - Azure combination makes deployment super easy and almost entirely automatic, I can spend nearly all of my time focused on writing blog articles rather than maintaining the separate modules of the old tech stack. It takes roughly 3 minutes for the GitHub Action to complete a deployment process, which is triggered upon pushing a commit to the repository.
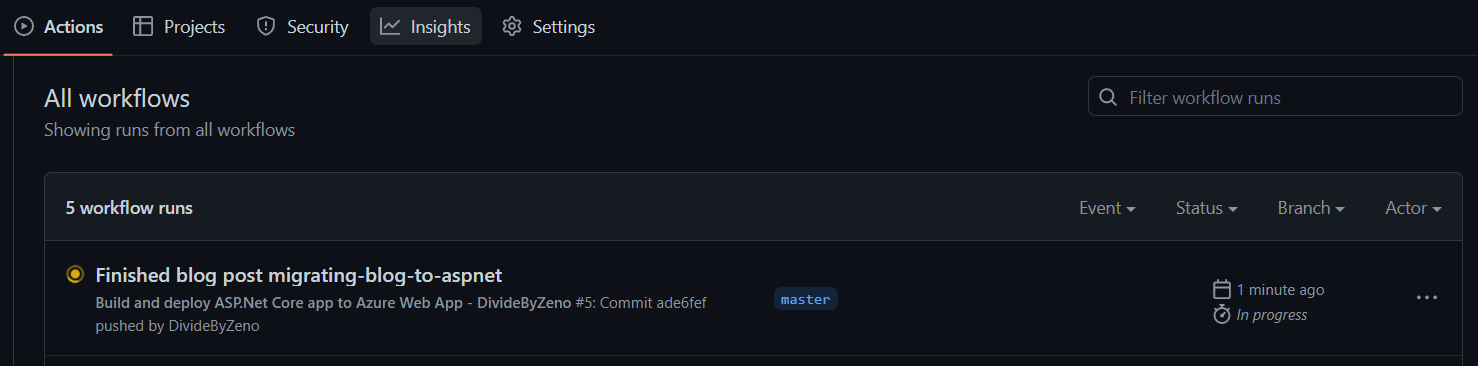
Figure:GitHub Actions executing the deployment workflow for my blog.
3. Pros and Cons
Although I much prefer the ASP.NET solution, there are pros and cons to each, outlined below:
Old Tech Stack
Pros
- Greater flexibility in choosing individual tech stack components
- Minimalist dev environment
- Fewer overall dependencies
Cons
- Not integrated out-of-the-box
- Custom DevOps pipeline necessary to avoid tedium
- Overall operational capability is not streamlined
New Tech Stack
Pros
- Every step from development to production is integrated
- One-click deployment provided out-of-box in Visual Studio
- Microsoft ecosystem of applications streamlines entire process
Cons
- Must register for Microsoft account(s) to use certain features
4. Conclusion
The final result is live at https://dividebyzeno.azurewebsites.net/. If you made it this far, thanks for reading and happy coding.